ウェブサイトをリニューアルしました!
旧ウェブサイトのアーカイブはこちら。
もともとはHTML・css(scss)を生で手打ちしていたので辛かった…。Hugoを使うことで、.mdでコンテンツを書けるし、サイトの構造もきれいになるので満足です。
ということで、SSG(Static Site Generator: 静的サイトジェネレーター)であるHugoを用いて、GitHub Pagesでホスティングし、GitHub Actionsで自動デプロイ・CI/CDを実現するまでの流れをまとめておきます。
前提・動作環境
まずは公式ドキュメントを参考に。
GoとHugoのインストールには、Chocolateyを使用しました。
- Windows 11
- Git 2.49.0.windows.1
- Chocolatey v2.5.1
また、GitHub Pagesでホスティングするため、GitHubアカウントを作成し、リポジトリを用意しておきます。ここは略。
一連の流れ
公式ドキュメントを参考にしたほうが良いのですが、有志の方がまとめている記事のほうがわかりやすかったです。この記事の末尾にまとめてあります。
それはそれとして備忘録として自分なりに一連の流れをまとめておきます。
init
hugoディレクトリを作成したい場所で
1
| hugo new site {ディレクトリ名}
|
テーマ
テーマはhugo-theme-stack v3.32.0(リンク)を使いました。
他にもいいテーマはたくさんあるので探してみる(リンク)のはオススメです。
テーマのクローンをする際には、git submoduleがオススメです。
GitHubで共有する際に、テーマのリポジトリも一緒に管理できるようになります。
1
2
| cd {ディレクトリ名}
git submodule add https://github.com/CaiJimmy/hugo-theme-stack themes/hugo-theme-stack
|
このテーマディレクトリhugo-theme-stackの中に、exampleSiteディレクトリがあるのでこれを活用して練習してみましょう。
hugo.****- ****は、yaml・toml・jsonのうち好きなものを選んで良いみたいです。
- 昔は
config.yamlだったみたい。
contentディレクトリ
を{ディレクトリ名}直下に移してしまいます。すでにあるhugo.tomlは削除してしまいます。
hugo オススメ設定
まず前提として、初期状態はディレクトリ直下にhugo.tomlがあったはずです。
現在は、exampleSiteから取得したhugo.****になっているはずです。
これは、
- 分割が可能で
config\_defaultディレクトリでも有力
です。
そのため、以下のようにディレクトリを整理しました。
1
2
3
4
5
6
| {ディレクトリ名}/
config/
_default/
hugo.yaml
markup.yaml
params.yaml
|
以下にそれぞれの.yamlの内容を示します。
なお、このhugo.yamlの説明に関しては、Stack Getting Startedがある程度説明してくれています。
hugo.yaml
 1
 2
 3
 4
 5
 6
 7
 8
 9
10
11
12
13
14
15
16
17
18
19
20
21
22
23
24
25
26
27
28
29
30
31
32
33
34
35
36
37
38
| # baseURL: "localhost:1313/"
baseURL: "https://rakugan.jp/"
languageCode: ja
title: 落雁 | rakugan
theme: stack
copyright: 落雁|rakugan
pagination:
pagerSize: 7
permalinks:
post: /post/:slug/
page: /:slug/
menu:
social:
- name: GitHub
weight: 0
url: https://github.com/rakugan/
params:
icon: brand-github
- name: X
weight: 0
url: https://x.com/rakurakugan/
params:
icon: brand-x
main: []
related:
includeNewer: true
threshold: 60
toLower: false
indices:
- name: tags
weight: 100
- name: categories
weight: 200
|
markup.yaml
 1
 2
 3
 4
 5
 6
 7
 8
 9
10
11
12
13
14
15
16
17
18
19
20
21
22
23
24
25
26
27
28
29
30
| goldmark:
extensions:
passthrough:
enable: true
delimiters:
block:
- - \[
- \]
- - $$
- $$
inline:
- - \(
- \)
renderer:
## Set to true if you have HTML content inside Markdown
unsafe: true
tableOfContents:
endLevel: 4
ordered: true
startLevel: 2
highlight:
noClasses: false
codeFences: true
guessSyntax: true
lineNoStart: 1
lineNos: true
lineNumbersInTable: true
tabWidth: 4
|
params.yaml
 1
 2
 3
 4
 5
 6
 7
 8
 9
10
11
12
13
14
15
16
17
18
19
20
21
22
23
24
25
26
27
28
29
30
31
32
33
34
35
36
37
38
39
40
41
42
43
44
45
46
47
48
49
50
| mainSectons:
- post
featuredImageField: image
rssFullContent: true
favicon: /favicon.ico
dateFormat:
published: "2006/01/02"
lastUpdated: "2006/01/02"
sidebar:
emoji:
subtitle: マネジメントが得意😘
avatar:
enabled: true
local: true
src: img/bce2e8.png
footer:
since: 2025
customText: This Site Made by Rakugan
article:
math: true
toc: true
readingTime: false
license:
enabled: true
default: Licensed under CC BY 4.0
widgets:
homepage:
- type: search
- type: archives
params:
limit: 5
- type: categories
params:
limit: 10
- type: tag-cloud
params:
limit: 10
page:
- type: toc
opengraph:
twitter:
site: rakurakugan
card: summary
enabled: true
|
日本語フォントの設定
Hugo+Stackテーマの導入メモをそのまま実行しました。
layouts/partials/head/custom.htmlを新規作成し、以下の内容を書き込みます。これで、テーマディレクトリ以下を直接変更しなくとも、上書きができます。
 1
 2
 3
 4
 5
 6
 7
 8
 9
10
11
12
13
14
15
16
17
18
19
20
21
22
| <style>
/* Overwrite CSS variable */
:root {
--ja-font-family: "游ゴシック体", "Yu Gothic", YuGothic, "ヒラギノ角ゴ Pro",
"Hiragino Kaku Gothic Pro", "メイリオ", "Meiryo";
--base-font-family: "Lato", var(--sys-font-family), var(--ja-font-family),
sans-serif;
}
</style>
<script>
(function () {
const customFont = document.createElement("link");
customFont.href =
"https://fonts.googleapis.com/css2?family=Merriweather:wght@400;700&display=swap";
customFont.type = "text/css";
customFont.rel = "stylesheet";
document.head.appendChild(customFont);
})();
</script>
|
localで試す
で、ローカルサーバーが立ち上がります。
localhost:1313に建っていると思うので、ブラウザで見てみましょう。
自分用に整備する
exampleSiteから持ってきたcontentディレクトリ以下のうち、必要なものは次のものです。
content/post/ディレクトリ- ここに記事を追加するようにします。必要のない記事は削除してしまいましょう。
- 記事の作成にあたっては、記事ごとにディレクトリを分ける方法が推奨されています。
- 例:
hugo new post/my-first-post/index.mdmy-first-postディレクトリの中に、関連する画像などを入れるようにするみたい。
content/page/ディレクトリabout、archives、links、searchいずれも必要に応じて編集・削除してください。サイドバーに影響します。
content/categories/ディレクトリ- これがないと
hugo.****で頑張ってもカテゴリーページが生成されません。- 上の
about、archives、links、searchについても同様です。
なお、hugo new siteのテンプレートは、archetypes/default.mdが使われます。私のテンプレートはこちら。
archetypes/default.md
 1
 2
 3
 4
 5
 6
 7
 8
 9
10
11
12
| ---
title: {{ replace .Name "-" " " | title }}
description:
image:
slug: {{ .Name }}
published: {{ .Date }}
# lastmod: {{ .Date }}
categories:
-
tags: []
license: Licensed under CC BY 4.0
---
|
デプロイ
今回は、Hugo + GitHub Pages + GitHub Actions で独自ドメインのウェブサイトを構築するを参考に、Hugoプロジェクトのリポジトリでコミットする度に、自動でデプロイ用リポジトリにデプロイすることを考えます。初めてなので詳述します。
deploy key の作成
ssh-keygenを用いて、sshキーを作成します。作成場所には注意する必要があり、普通は~/.ssh/に作成するべきです。また、今回の用途においては、秘密鍵も公開鍵もGitHubリポジトリに登録してしまうので、必要がなくなったら端末上のファイルを削除しても良いと思います。
最初の入力はファイル名、次の入力はパスフレーズ(空欄でも良い)です。ターミナルに謎の画像が出現して、該当ディレクトリにファイルが2つ作成されているはずです。
1
2
3
| ~/.ssh/
{ファイル名}
{ファイル名}.pub
|
deploy key の登録
このうち、{ファイル名}.pubの中身をGitHubのデプロイ用(Web公開用)リポジトリのSettings > Deploy keysに登録します。
pushも必要なので、Allow write accessにチェックを入れるのを忘れずに。
また、{ファイル名}の中身を、GitHubのHugoプロジェクト(秘密用)リポジトリのSettings > Secrets and variables > Actions > New repository secretに登録します。名前はDEPLOY_KEYとでもしておきましょう。
GitHub Actions ワークフローの作成
再びHugoプロジェクトのリポジトリで、.github/workflows/gh-pages.yamlを作成します。内容は以下の通り。
 1
 2
 3
 4
 5
 6
 7
 8
 9
10
11
12
13
14
15
16
17
18
19
20
21
22
23
24
25
26
27
28
29
30
31
32
33
34
35
36
| name: github pages
on:
push:
branches:
- main # Set a branch name to trigger deployment
jobs:
deploy:
runs-on: ubuntu-24.04 # バージョンは適宜変更してください
steps:
- uses: actions/checkout@v2
with:
submodules: true # Fetch Hugo themes (true OR recursive)
fetch-depth: 0 # Fetch all history for .GitInfo and .Lastmod
- name: Setup Hugo
uses: peaceiris/actions-hugo@v2
with:
hugo-version: "0.152.2" # バージョンは適宜変更してください
- name: Build
run: hugo --minify
# - name: Deploy
# uses: peaceiris/actions-gh-pages@v3
# with:
# github_token: ${{ secrets.GITHUB_TOKEN }}
# publish_dir: ./public
- name: Deploy
uses: peaceiris/actions-gh-pages@v3
with:
deploy_key: ${{ secrets.DEPLOY_KEY }} # シークレットの名前に変更してください。
external_repository: rakugan/rakugan.github.io # デプロイ先リポジトリです。適宜変更してください。
publish_branch: main # デプロイ先ブランチです。適宜変更してください。
cname: rakugan.jp # 独自ドメインを使う場合は設定してください。
|
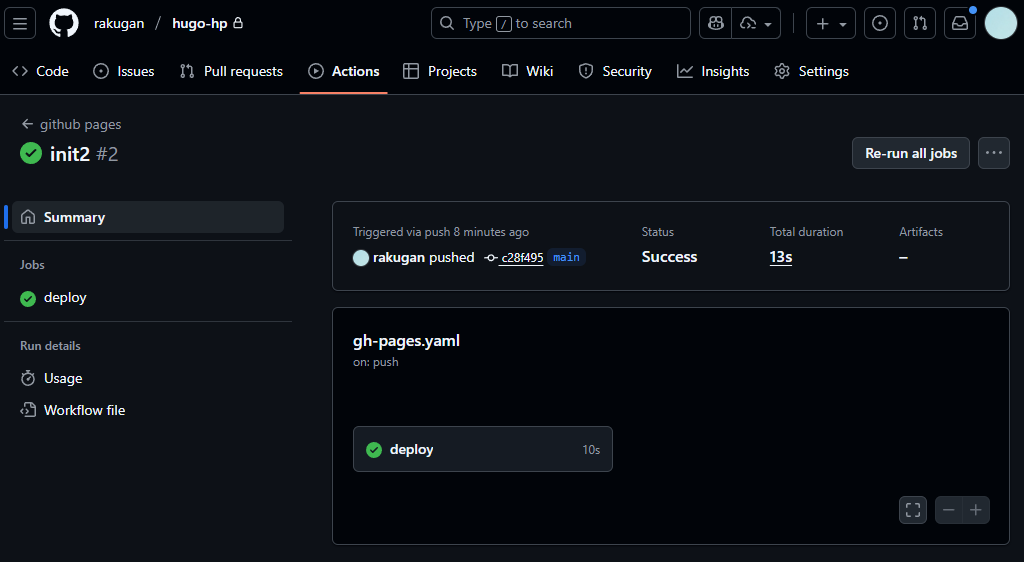
以上により、Hugoプロジェクトリポジトリのmainブランチにpushするたびに、GitHub Actionsが走り、デプロイ用リポジトリに成果物がpushされるようになります。うまくいっているかは、HugoプロジェクトリポジトリGitHub上のActionsタブで確認できます。
独自ドメインの設定
もしGitHub Pagesで独自ドメインを使う場合は、デプロイ用リポジトリのSettings > Pagesで設定します。また、DNSレコードも適宜設定してください。ここは略。
参考にしたサイト
